Making your own cannabis skincare products can be a really fun and satisfying experience! But to make sure everything goes off without a hitch and your products come out great, it’s important to have the right tools.
Table of Contents
*As an Amazon Associate, I earn from qualifying purchases
Essential Measuring Tools
Here is my personal list of must-haves and handy-to-haves.
Digital Scales
Digital scales are an essential tool for making DIY skincare products. These allow me to measure ingredients accurately and ensure that I’m using the right amount of each ingredient. These are essential equipment needed because I weigh everything – whether they are powdered or liquids.
You will see lots of formulations online that call for teaspoons, cups, and a pinch of something else. This is not safe when you formulate using ingredients like essential oils and preservatives. When you make a good product, you want to be able to do it just the same next time. Grams are accurate, and they allow you to know the percentage ratio exactly, every single time.
Choose a digital scale that is highly accurate and can measure small ingredient amounts. They need to weigh from 0.01g upwards. Try to get a set that weighs up to about 500g. More than that and they tend to jump up in price hugely, less than that, and they are really annoying having to measure everything separately.
Use a digital scale with a tare function to reset the scale to zero after adding an ingredient. This makes it easier to measure multiple ingredients without having to use multiple bowls or containers.
The “M” button on many scales means “mode” and allows you to change to ounces, Troy ounces, and so on. They are for jewellers and drug dealers LOL. Always remember to check the settings before you use it to make sure you are weighing in grams and not carats!
Digital Thermometer
A digital thermometer is another essential tool for making DIY skincare and cannabis products. It allows you to measure the temperature of your ingredients accurately, which is important for ensuring that your products are properly emulsified, and also not damaged by excessive heat.
Some emulsifiers need to be at a certain temperature before they function properly. Some active ingredients and preservatives must be kept below a specific temperature to function properly and avoid heat damage. Don’t be tempted to use that old meat thermometer with the picture of a chicken, pig, and a cow in the back of the kitchen drawer. Yep, I tried that, and it doesn’t work well. You need to know the exact temperature.
Every temperature in my book is given in Fahrenheit and Centigrade. A digital thermometer will have a button, so you can choose which one you want to use. They do not need to be expensive ones from a chef supply shop. I don’t like the glass ones because I used to break too many of them. You can certainly use them if you want, and are less clumsy than me.
Plastic Pipettes
When you are adding very small amounts of liquid ingredients, a plastic pipette is ideal. Concentrated actives or essential oils can be very difficult to get out of a dropper bottle. Use a paper towel to remove the dropper, weigh the ingredient with the pipette, and then return the dropper to the bottle.
Mixing and Heating Equipment
When it comes to making DIY cannabis skin care products, having the right mixing and heating equipment is essential. In this section, I will discuss the different types of equipment you will need to create your own skincare products.
Saucepan
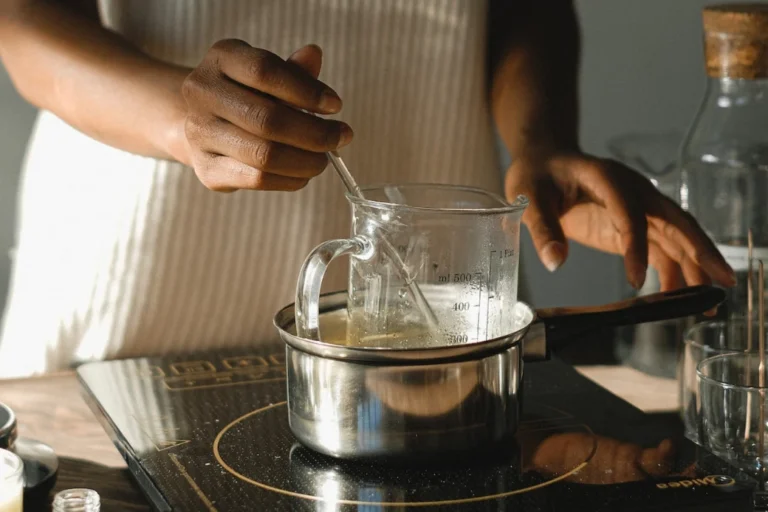
You will need a saucepan to heat up ingredients such as oils, waxes, and butters as part of a double boiler or Bain Marie. Using one of your existing saucepans is a cheap and simple way to make your own Bain Marie. You can use any type of saucepan since it only serves as the base for the boiler and your product won’t come into contact with it.
Silicone Trivet
This can be used to protect your work surface from heat damage when using a saucepan. It is also useful for holding hot glass or metal jugs when using your saucepan as a double boiler.
Half fill your saucepan with boiling tap water and drop a silicone trivet in the base. This means that the bottom of the container you are going to make your products in does not touch the bottom of the saucepan, and there is your double boiler.
Borosilicate Glass Jugs
Borosilicate glass jugs are heat-resistant and can be used to melt ingredients in your double boiler. You will need at least two borosilicate glass jugs of different sizes to make DIY skin care products.
These are for heating your fat phase, water phase, and for making gels. You can safely use an immersion blender / stick blender in a borosilicate glass jug, just be careful. They clean up easily in a dishwasher, and if you are careful with them, they are very durable. The measurements on the side are just guides, but it doesn’t affect us since we’re weighing everything.
Stainless Steel Jugs
Stainless steel jugs are another possibility instead of the borosilicate glass jugs. Stainless steel is very durable, and you will need at least two jugs of different sizes. Try to avoid really heavy-duty ones as the digital scales will take the weight into account.
No other metals please, no plastic, copper, enamel, and definitely no aluminium. You may not realise, but the measures on the sides of these items are also not usually very accurate.
When cooling the borosilicate or stainless steel jugs down, use the saucepan with cold water as a water bath.
Mixing Implements
Having the right mixing implements is crucial. Here are three essential tools you should consider adding to your collection.
Silicone Spatulas
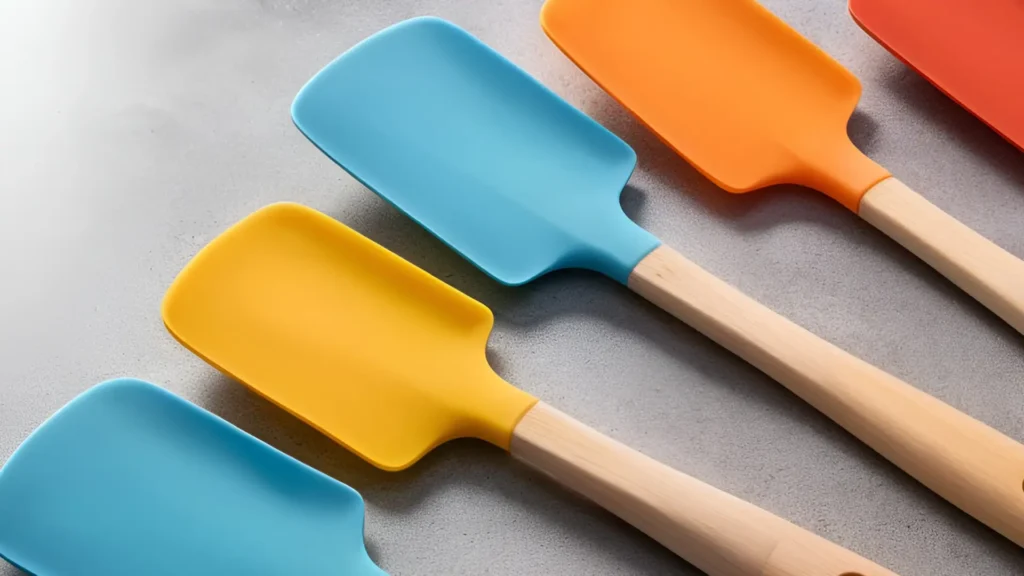
Silicone spatulas are a must-have for any skincare DIY-er. They are perfect for scraping every last bit of product out of containers, and their flexible heads make them ideal for mixing and spreading. Plus, they’re easy to clean and won’t absorb any of your skincare ingredients. Definitely do not use a wooden spoon – it’s not at all hygienic!
Flat Bottomed Whisk
This is often called a sauce whisk, and it is definitely not a balloon whisk. A balloon whisk is specifically designed to aerate and lift a cake mix or batter. This is the exact opposite of what we want. A flat-bottomed whisk stays lower in the emulsion, and when used slowly, does not aerate. It does, however, move the emulsion around so that it comes into contact with the fat and water. The goal is to get as much contact as possible with the fat and water. You could use the silicone spatula if you don’t have this.
Immersion Blender
An immersion blender, also known as a stick blender, is a powerful tool that can make quick work of mixing and emulsifying your skincare ingredients. Some emulsifiers require high shear to form an emulsion successfully. You and a hand whisk are not going to get anywhere near the speed you need.
Don’t even think of using your kitchen mixer because, just like the balloon whisk, it is designed to aerate. This is not desirable for most emulsification systems, and the finished product is likely to separate or split.
An immersion blender is especially useful for creating creamy lotions and body butters, as it can blend even the thickest ingredients into a smooth and silky texture. Just be sure to choose a model with a detachable head for easy cleaning.
It does not need to be a fancy one with all the attachments or endorsed by some celebrity chef – just a basic, cheap one is all you need.
Straining and Clean-Up
You only require a strainer if you are doing formulations that involve straining herbal infusions and decoctions. Your cannabis is going to be processed in the POT by NOIDS and the included strainer in that package is the best I have ever used. For the infusion of other herbs, like Calendula or Horsetail, a conical strainer is a good choice.
Ethanol
Obviously not strictly equipment needed, but it is important. This is to disinfect and cleanse the tools and equipment before you use them. It’s a good idea to do the same afterwards too before you put your equipment away.
You can also use Everclear, Rubbing Alcohol or Isopropyl Alcohol instead. Any of them can be used in a spray bottle for convenience. These are not the types of alcohol I recommend for making tinctures. These cleaning alcohols are not safe to use internally.
When using ethanol, it is important to handle it with care. It is flammable, so keep it away from heat sources and flames. It is also important to use it in a well-ventilated area to avoid inhaling fumes.
Containers
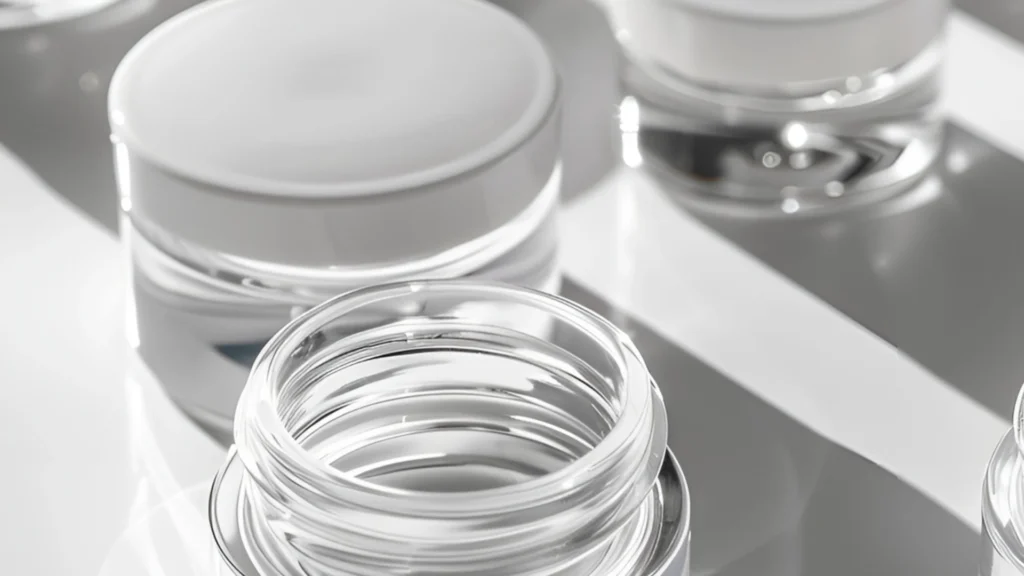
Once you have finished making your skincare products, you will want to put them into tubes, lotion pumps, or jars. Use only containers specifically designed for cosmetics, as some plastics can react with the ingredients and preservatives.
The natural ingredients are very prone to fungal contamination, which is in the air we breathe. Don’t touch the insides of jars or the lids with your bare fingers. I prefer to mist them with pure ethanol and stand them upside down on kitchen paper to allow them to be dry and sterile.
After you have filled your containers with your fabulous products, it is important to clean them up properly. Make sure to wash all your equipment thoroughly with warm soapy water and dry them completely before storing them away.
You can also have some pure ethanol in a spray bottle to mist the products after you have cleaned them. This will prevent bacteria from growing and ensure that your equipment is ready for your next DIY skincare project.
Kitchen Paper
I really want to emphasise the importance of good hygiene here. Clean your work surface first and wash your hands. Lay down some kitchen paper to put your tools and equipment on after you have cleaned it with the alcohol. Don’t pick the ingredients up with your fingers – use the clean tools you have.
I have seen articles and videos using some of the ingredients I use on a regular basis. In their video, the person is pushing ingredients off the spoon with their fingers and not using ingredients correctly.
A modern preservative will not clean up a dirty product after you have contaminated the ingredients. The use of a preservative assumes you have a clean product to start with. Doing this means you can have a cannabis cosmetic with a good shelf-life of 12 to 18 months on average, which also means that you can create a larger batch.
Conclusion
Mastering DIY skincare successfully and safely, especially with cannabis, hinges on having the right tools. Accurate measuring tools like digital scales and thermometers ensure precise ingredient ratios and optimal temperatures. Using quality mixing equipment such as saucepans, silicone trivets, and borosilicate glass jugs is really helpful for perfecting formulations, and none of it is expensive.
Hygiene is paramount – use ethanol for disinfection and select cosmetic-grade containers. By adhering to these practices, you can craft premium cannabis skincare with confidence and a good shelf-life.
FAQ
What basic tools do I need to start making my own skincare products at home?
You’ll need heatproof bowls, digital scales, measuring spoons, glass beakers, a hand blender or mini whisk, spatulas, and a thermometer. These help you measure, mix, and heat ingredients safely and accurately.
Do I need special equipment to make creams and lotions?
Yes, a digital scale for precise weighing, a hand blender for blending, and a thermometer to check temperatures are especially useful for creams and lotions. Clean, heat-proof glassware is also important.
Can I use my kitchen utensils for skincare formulation?
You can, but it’s best to keep your skincare tools separate from food prep to avoid contamination. Use dedicated bowls, spoons, and measuring equipment for your DIY products.
How do I safely heat oils and waxes for DIY skincare?
Use a double boiler or a heatproof bowl over a pan of simmering water. This method gently melts ingredients without burning or overheating them.
Why is a digital scale important in cosmetic making?
A digital scale lets you measure ingredients by weight, which is more accurate than using volume. This precision helps your products turn out right and ensures safe concentrations.
Do I need to sterilise my equipment?
Yes, sterilising all your tools before you start helps prevent contamination and extends the shelf life of your skincare creations.
What’s the best way to store homemade skincare products?
Use clean, airtight glass jars or cosmetic-safe plastic jars. Store your products away from direct heat and sunlight to keep them fresh for longer.
Can I make skincare without preservatives?
Only if you’re making oil-based products with no water or planning to use your product up within a few days. Anything with water in it needs a preservative for safety.
Are there any safety tips for beginners?
Always label your products, do a patch test before using them, and follow recipe instructions carefully. Clean up spills straight away and keep your workspace tidy. Make notes about what you have made for future reference.
If you liked this blog post, I would love it if you shared it with a friend.
If you use Pinterest, please pin this post.