


Facial oil recipes for oily skin might sound like the last thing you need when your forehead is already shiny by lunchtime. Fair enough. But there’s more to choosing the oils than finding something that disappears quickly.
Your skin might be oily all over, prone to blocked pores, or tight across the cheeks while your nose carries on doing its own thing. One blend won’t suit every version of oily skin.
Table of Contents
I’ve put together four blends with those differences in mind, explaining why each oil is there. There are no essential oils in these recipes. Let the vegetable oils work their own magic!
If you’d like to understand how to choose and combine the oils yourself, my Blend Your Own Facial Oil: A Practical Guide to Choosing Oils explains the fatty acids and what each ingredient brings to a blend.
Choosing Your Facial Oil Recipes for Oily Skin
Start with what your skin is doing. Does it become oily soon after washing? Are blocked pores the main nuisance? Or do your cheeks feel tight while your forehead shines away quite happily?
Those differences matter when choosing your oils. Getting older doesn’t necessarily mean leaving oily skin behind, either. These four recipes give you a choice:
- Everyday Oiliness: for skin that is regularly oily, without much dryness or frequent blemishes.
- Congestion and Occasional Blemishes: for skin where blocked pores are more of a concern. This may sound familiar to teenagers, but there’s no age limit on a troublesome nose.
- Oily but Uncomfortable: for skin that feels tight or dry as well as oily, perhaps after cleansing or shaving.
- Mature Combination Skin: for an oily forehead, nose or chin alongside cheeks that increasingly need a little more care.
You don’t have to fit neatly into one group. Choose according to how your skin behaves now, rather than what it was like twenty years ago.
The blends bring together oils chosen for different reasons: supporting the skin’s protective barrier, supplying useful fatty acids and conditioning areas that feel dry despite the oiliness. Beneath each recipe, I’ll explain what its ingredients contribute and why that combination might suit you.
These oils won’t correct hormonal changes or replace acne treatment. You also don’t have to put oil everywhere just because you’ve made a bottle. Start sparingly, paying attention to the areas that need it.
#1 Everyday Oiliness
Your face is clean, you’ve barely got going with your day, and the shine is already making a comeback. You don’t have much dryness, and spots aren’t your main concern. Your skin simply produces more oil than you’d like.
For this blend, I’ve chosen three oils. Each has a reason to be in the bottle.
- Hazelnut Oil provides softening care without making this an especially rich blend. It is high in Oleic Acid (Omega-9), which helps keep the skin supple. Oily skin still needs conditioning. The aim is to leave it comfortable without piling on more than it needs.
- Jojoba helps your skin hold on to moisture. That might sound unnecessary when your forehead is shiny, but oil and water are different things. You can have plenty of one and still lose the other. Jojoba gives some protection against that moisture loss without the thick coating you might expect from a balm. Here, it helps keep the blend useful for everyday care rather than choosing everything simply to make your face feel dry.
- Thistle Oil is rich in Linoleic Acid (Omega-6), which helps your skin’s protective barrier hold on to moisture. A shiny face can still feel tight and dehydrated, so we want to keep the skin comfortable rather than trying to dry it out.
That gives us a straightforward blend for oily skin that needs a little daily care. We can save the more specialised additions for the recipes where dryness or discomfort gives us a reason to use them.
Recipe
For a 100 g batch, weigh:
- Hazelnut Oil: 39.75 g
- Jojoba: 30 g
- Thistle Oil: 30 g
- Rosemary Antioxidant: 0.25 g
Total: 100 g
Apply a small amount to clean, slightly damp skin, or over your usual moisturiser. Spread it thinly and let it settle before deciding whether you need more. You’re aiming for comfortable skin, so start with less than you think you need.
#2 Congestion and Occasional Blemishes
Perhaps the shine doesn’t bother you as much as the blocked pores around your nose and chin. You get the occasional spot, too, but scrubbing harder only leaves your face feeling sore.
For this blend, Thistle takes the largest share. I’ve kept Hazelnut and Jojoba, then added a smaller amount of Kiwi Seed Oil.
- Thistle Oil supplies plenty of Linoleic Acid (Omega-6). Research suggests this fatty acid has a useful role in how skin cells shed inside the follicles, where oil and dead cells can collect and form a blockage.
- Jojoba helps soften the oily material that collects in blocked pores, making it useful when congestion is your main concern. There’s no need to scrub or squeeze. It also helps keep the surrounding skin comfortable, especially if you’ve been trying to wash the oiliness away.
- Hazelnut Oil softens the skin without leaving it feeling heavily coated. When you’re dealing with blocked pores, it’s tempting to keep stripping everything away, but the rest of your face still needs some care. Hazelnut provides that conditioning while allowing us to keep this blend light.
- Kiwi Seed Oil is particularly rich in Alpha-Linolenic Acid (Omega-3). It helps soften and condition the skin, but used neat its very dry feel can leave your face tight and uncomfortable. Blending makes that dryness useful: Kiwi takes the edge off the fattiness of the other oils, while they make it more comfortable to wear. That’s why I’ve included a small amount here.
This is a conditioning facial oil for skin prone to congestion. It won’t replace treatment for persistent acne.
Recipe
For a 100 g batch, weigh:
- Thistle Oil: 44.75 g
- Jojoba: 25 g
- Hazelnut Oil: 20 g
- Kiwi Seed Oil: 10 g
- Rosemary Antioxidant: 0.25 g
Total: 100 g
Use a small amount on clean, slightly damp skin, spreading it gently without prolonged rubbing over blemishes. Give it time to settle before adding anything more. If you notice more blocked pores or spots after introducing it, stop using it. Your skin’s response matters more than how suitable an ingredient sounds on paper.
#3 Oily but Uncomfortable
Your forehead is shiny, but your cheeks feel tight. Washing again doesn’t help, and shaving can leave your face feeling even more uncomfortable. You need some conditioning, but a rich oil is the last thing you fancy putting on.
This blend combines Thistle, Jojoba, Kiwi Seed and Borage to care for the dry areas without leaving the rest of your face feeling overloaded.
- Thistle Oil supplies Linoleic Acid (Omega-6), which your skin needs for its protective barrier. When that barrier isn’t working well, moisture escapes more easily. You can end up with skin that feels dry despite the oil on its surface. Thistle helps you look after that moisture barrier instead of continually trying to wash the shine away.
- Jojoba helps hold moisture in and keeps the skin supple. That is useful when your cheeks start feeling tight again soon after washing. You’re giving those areas some protection without covering your face in a thick balm.
- Kiwi Seed Oil is particularly rich in Alpha-Linolenic Acid (Omega-3). It helps soften rough skin, while its dry feel takes the edge off the fattiness of the other oils. Used alone, that dryness can feel tight and uncomfortable. Blended with the others, it helps you get the conditioning without such an oily finish.
- Borage Oil supplies Gamma-Linolenic Acid, usually shortened to GLA. This is another Omega-6 fatty acid, which the skin has limited ability to make from Linoleic Acid. Borage helps soften dry patches and keep the skin comfortable, useful when your face manages to feel oily and dry at the same time. Its concentrated GLA content means we can include it without needing a large amount.
The aim here is comfortable skin that holds on to its moisture. Your forehead may still produce oil, but that doesn’t mean you should leave the dry parts of your face to fend for themselves.
Recipe
For a 100 g batch, weigh:
- Thistle Oil: 39.75 g
- Jojoba: 35 g
- Kiwi Seed Oil: 15 g
- Borage Oil: 10 g
- Rosemary Antioxidant: 0.25 g
Total: 100 g
Smooth a small amount over clean, slightly damp skin, concentrating on the areas that feel tight or rough. You can also apply it over your usual moisturiser. After shaving, let the skin settle first and avoid cuts or broken skin. If your cheeks need more care than your forehead, apply it that way. There’s no need to give every part of your face the same amount.
#4 Mature Combination Skin
You might have expected the oily skin to disappear as you got older. Instead, your nose and forehead still shine, while your cheeks feel drier and need more care than they used to.
Hormonal changes can be part of that picture, but you don’t need to know the precise cause to recognise what your face needs. This blend combines Jojoba, Hazelnut, Rosehip and Borage to condition the drier areas while keeping the oily ones in mind.
- Jojoba helps reduce moisture loss, making it useful when your cheeks feel dry again soon after applying a product. It also helps soften the oily material that collects in pores, so it has a place here even if your nose is still prone to congestion.
- Hazelnut Oil helps keep the skin soft and supple. Its Oleic Acid (Omega-9) content provides conditioning for cheeks that have become rough or less comfortable. You can give those areas some care without reaching straight for a much richer blend.
- Rosehip Seed Oil supplies both Linoleic Acid (Omega-6) and Alpha-Linolenic Acid (Omega-3). Linoleic Acid helps maintain the protective barrier that keeps moisture in, while the oil as a whole softens and conditions dry, rough skin. That makes Rosehip useful here when the shine on your forehead tells a different story from the dryness across your cheeks.
- Borage Oil adds GLA, another Omega-6 fatty acid, alongside those supplied by Rosehip. It helps soften dry patches and improve comfort. We’re using it for the dryness that comes with this combination, rather than assuming older skin needs a heavier coating of oil.
You can adjust where you apply this blend as your skin changes. Some days your cheeks may welcome it while your forehead needs very little.
Recipe
For a 100 g batch, weigh:
- Jojoba: 39.75 g
- Hazelnut Oil: 30 g
- Rosehip Seed Oil: 20 g
- Borage Oil: 10 g
- Rosemary Antioxidant: 0.25 g
Total: 100 g
Apply a small amount to clean, slightly damp skin, or over your usual moisturiser. Start with your cheeks and any other dry areas, then spread what is left across the parts that need less. Let it settle before deciding whether to add more. You’re looking for softness and comfort, so there’s no need to leave your whole face shining.
Making Your Facial Oil Blend
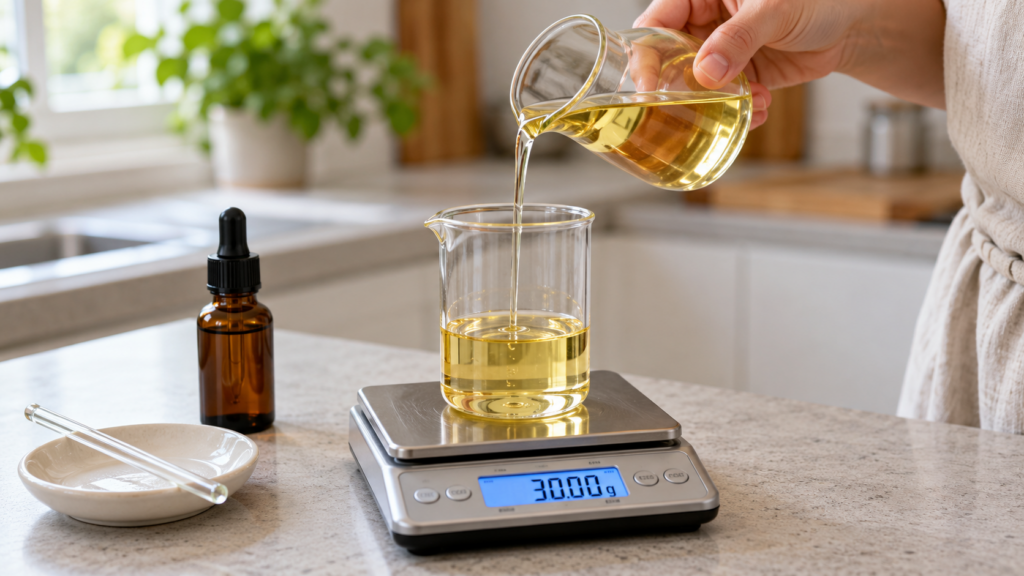
There’s no heating needed for any of these recipes. You’re simply weighing the ingredients and mixing them thoroughly.
You’ll need accurate scales, a clean, dry beaker, something to stir with and a suitable bottle. Your scales must be able to weigh the 0.25 g of Rosemary Antioxidant accurately. Don’t try to judge that small amount by eye or convert it into drops.
- Weigh each oil into your beaker, taking care with the smaller quantities.
- Add the Rosemary Antioxidant and stir thoroughly, scraping around the sides and bottom.
- Pour into a clean, completely dry bottle. A small funnel can make this less fiddly.
- Label it with the blend name, ingredients and date made.
All four recipes make 100 g. You can divide a batch between smaller bottles, keeping one for everyday use and the others tightly closed until needed.
Why Add Rosemary Antioxidant?
Oils gradually oxidise, particularly when exposed to warmth, air and light. Eventually, their smell changes and they become rancid. Some of the oils we’re using, including Kiwi Seed, Rosehip and Borage, need particular care because of their fatty acid composition.
Rosemary Antioxidant helps slow that process. It is not Rosemary Essential Oil, and it isn’t there to perfume your blend.
I use 0.25 g in a 100 g batch of these recipes. This amount refers to the Rosemary Antioxidant extract used here, so check the supplier’s guidance if yours is a different product. More isn’t automatically better. I’ve found that increasing mine to 0.5% affects the colour more than I want.
An antioxidant doesn’t protect against bacteria or mould. These recipes contain no water, so keep your equipment and bottles dry and don’t add hydrosols, aloe juice or water to the bottle. That would need a different formulation and suitable preservation.
Using and Storing Your Facial Oil
With oily skin, start small. Put a little into your palm, spread it between your hands and smooth it gently over the areas that need it. You can add more another time if your skin still feels dry.
Apply to slightly damp skin or over your usual moisturiser. The oil helps keep moisture in, but it doesn’t supply the water your skin needs. If your face feels tight beneath the shine, using more oil may not be the answer.
Find What Suits Your Routine
Evening is a useful time to try your blend, when you can see how it settles without adding make-up or other products straight afterwards. If it leaves your skin comfortable, you can try a smaller amount during the day.
Give it time to settle before applying make-up. If your face still feels slippery or looks much shinier than you’d like, use less next time.
You can also treat different areas differently. Dry cheeks may appreciate a little oil while your forehead needs none. There’s no prize for finishing the bottle quickly.
Try a small area first, particularly if your skin reacts easily. Hazelnut Oil appears in blends #1, #2 and #4, so those blends are unsuitable for anyone with a hazelnut allergy. Stop using a blend if it causes irritation or noticeably increases your spots or blocked pores.
Keep Your Blend Fresh
Store your bottle tightly closed, away from sunlight and heat. A warm bathroom windowsill won’t do these oils any favours.
Keep water out and avoid touching the dropper to your face. If you’ve divided the batch between smaller bottles, leave the spares closed until you need them.
There isn’t one reliable shelf life I can give every homemade blend. It depends on the freshness of your ingredients, how they were stored before blending and how you look after the finished oil. Check the suppliers’ storage instructions and make a note of the oils’ best-before dates.
If the smell changes or the oil starts smelling stale, stop using it. Rosemary Antioxidant helps slow oxidation, but it can’t rescue oil that has already gone rancid.
Conclusion
These facial oil recipes for oily skin give you four starting points, depending on what else is going on with your face. Everyday shine, blocked pores and dry cheeks don’t all call for the same blend.
Choose the one that sounds most like your skin, apply a little and see how it settles. Pay attention to comfort as well as shine. Your cheeks might feel softer while your forehead needs less, and that’s perfectly workable.
You don’t need every interesting oil in one bottle. Choose each ingredient for what it brings, keep the quantities accurate and give your skin time to tell you whether the blend suits it.
🎧 Listen Instead
Keep the Recipes
Download all four facial oil recipes for oily skin on one printable page, with percentages, gram weights and the making method.
Can I use facial oil if I have oily skin?
You can, but start with a small amount and pay attention to how your skin responds. An oily forehead doesn’t rule out dry cheeks that could benefit from conditioning. Apply it where you need it rather than automatically covering your whole face.
Which oil is best for oily skin?
It depends on what comes with the oiliness. Jojoba and Hazelnut are useful starting points for everyday conditioning. Thistle supplies plenty of Linoleic Acid for blends aimed at congested skin, while Borage is worth considering when dry, uncomfortable patches are part of the picture.
Will facial oil clog my pores or cause spots?
The choice of oils matters. In my experience, some blends can make congestion worse, while choosing oils such as Hazelnut can make a real difference to how oily skin behaves. That’s why I’ve explained the ingredients in each recipe, so you can choose with your own skin in mind. Start with a small amount and see how it responds.
Do I still need moisturiser if I use facial oil?
Often, yes. Facial oil helps soften the skin and reduce moisture loss, but it doesn’t supply water and water-soluble actives. If your skin feels tight, use a suitable moisturiser and add a little oil afterwards for extra benefits and skin conditioning.
Can I mix different oils together for oily skin?
Yes. Choose each oil for a purpose and weigh your ingredients accurately. Three or four well-chosen oils are enough for these recipes. Adding more won’t necessarily improve the blend, and makes it harder to work out which ingredient disagrees with your skin if you react.

If you liked this blog post, I would love it if you shared it with a friend.
If you use Pinterest, please pin this post.